Thursday, October 17, 2013

What do I do with my sad, dying basil plant? Cheesy Homemade Eggplant Marinara Pastas

G'day!

Today's recipe was made about a week and a half ago (oops). Too bad this semester is whooping my tail and I have no time for blogging (as if graduate school is supposed to be this much work)! Ugh as IF!  If you've been displaced to the frozen tundra of central, PA or other northern states, your basil is probably starting to wilt and look a bit sad. Maybe it's depressed that you live in a frozen tundra and it's trying to send you a message: go back south. According to my comrade, EGG, the south has already risen again!

She obvi meant "What's" I think Erin still has a flip phone without autocorrect

So until I went home to my mommy the other week, I was working with an Osterizer Galaxie blender from around 1975. Like many of the appliances Andrew has given me (my mom gave me the blender though), it was probably one of the first of it's kind! I, like Tim Gunn, made it work though. I did work at the Planet Smoothie for 3+ years as a professional blendgineer after all. Anyway, I couldn't really use said blender to make pesto because... you know... it wasn't the bomb and I couldn't make it work (sorry, Tim Gunn). So what do I do with the end of my sad, dying basil plant? Invite Brittany and Austin over for dinner and make a Splendid Table inspired pasta dish! My mom made me the original splendid table dish for my 16th birthday and I fell in love with it.

The Osterizer Galaxie in all its glory

What you need:
Handfull + of basil
1 can of whole tomatoes
2tbsp of tomato paste
2 large shallots
1 clove of garlic
1 lb pastas that soak up sauce
1 Eggplant (how fall festive!)
1/2 cup gorgonzola
Wine

olive oil
salt
pepper
crushed red pepper flakes

Step 1: Preheat the oven to 350 degrees and then go outside and collect the end of your sad basil plant

Poor little basil plant :( I'll miss you, summer herb!

Step 2: Kitchen prep: chop the garlic, shallots, basil, and eggplant. The eggplant should be cut into 1"x 1" cubes. Lauren told me that eggplants are very moist vegetables and can take over with their moistness. Moist. A way to combat that is, once you cut up the eggplant, put it in a colander in the sink and sprinkle salt on the eggplant. Once it's dried out, rinse the salt off and prepare it for the oven.


Step 3: Coat a cookie sheet in olive oil and put in eggplant, covered in salt, pepper, and olive oil. Throw it in the oven for about 15 minutes or until the top is browned. Also put the pot of water on to boil for the pastas.

Step 4: As the eggplant is roasting, begin to make your sauce. Put olive oil, salt, pepper, shallots, and garlic into a pan. Once it has started to brown, add the tomato paste.  Top secret tomato paste tip!! My mama once said: once you opened a can of tomato paste, scoop the rest of the paste into tablespoon clumps and put them on wax paper in the freezer. Once they've hardened, put them in a plastic bag to store for later usage. Those moms.... ya know? I feel like only a mom would know that.


Step 5: Once your paste has properly integrated itself into your shallots and garlic, add the basil and get it all mixed up real good and stuff. Then add your wine. Usually about 1/4 cup to 1/3 cup will do. Really just try not to drink the whole bottle before you finish making the sauce. You need SOME of the wine and maybe you have some lying around that you don't plan to drink. Perhaps you put a bottle in the freezer to cool faster and forgot about it and went to bed.... Perhaps you made a winesicle in the freezer.... Anyway! Add the wine and reduce this delicious mixture into one beautiful piece of condensed marinara.
It start like dis....
...and reduce down to dis


Step 6: At this point, your eggplant should be done and your sauce is also almost done. Open a can of whoopass. Now open a can of tomatoes. I buy unsalted tomatoes but salted works too. Just trying to watch my figure :) Not really. I just prefer my own amounts of salt. Drain the juice from the tomatoes and crush them! This is a good time to get out any anger issues you might have. Take it out on the tomatoes. 

TJ's has the best canned tomatoes, obvi

Step7: Add the crushed tomatoes and red pepper flakes (optional) to the reduced mixture and heat it all up.

For the record, you can stop here and can this marinara sauce. It's delish.

Step 8: Add the eggplant to the sauce. Once the pasta is done, drain it and fold the sauce into the pasta. You're welcome to stop here OR you can add about 1/2 cup gorgonzola to the pasta and either bake it for about 5 minutes or just let the heat melt the cheese into the dish. Either way it's supremely nomsy.

Presentation is everything! What a terrible picture.

Delicious Level: 5/5 Noms (om nom nom nom nom nom)
Difficulty Level: Easy Peasy.
Lesson Learned: Take a better picture of the final product. This one sucks.

Here's to eatin' good and eatin' local! Cheers and uff-da!


Sunday, September 22, 2013

Brown Sugar Cinnamon Apple Pastries

I'm sorry... did you say brown sugar cinnamon apple pastries?!

Yes. I did. I made it up me-self! No pintrest! Can you believe that? I thought my own thoughts, ate some delicious food, and now I'm sharing my recipe with you!

This was the dessert (not desert) for our autumnal equinox dinner tonight. Apples and cinnamon and allspice are very autumnal and delicious. This tartlet dessert was a perfect ending to our fatty fatty delicious dinner and it all went together like Jenny and Forrest. So nomsy.

What you need:
1/4 cup Brown sugar
3 tablespoons cream cheese (this can be estimated as scooping cream cheese is a pain in the ass)
1 tsp allspice
1.5 tsp cinnamon
1 granny smith apple
1 can of croissant dough
1/4 cup butter (softened)
1 egg

Step 1: Cut up the apple into thin, small slices. Try not to eat the whole apple while slicing it.

Step 2: In a bowl combine brown sugar, softened butter, cream cheese, allspice, and cinnamon. This will not delicious but it will taste like a dream. A good dream too.
"Things that don't photograph well" - By Alison Murray
Chapter 2:
Also This.


Step 3: Flatten out the croissant rolls. You should have 4 large rectangles (8 rolls). Leave the dough in large rectangles and try to roll them out to be a little flatter. Cut the rectangles into 4 smaller rectangles (16 smaller rectangles (holy cow, if I type rectables instead of rectangles one more time...)).

Step 4: Fill each rectangle with a little bit of the cinnamon brown sugar mix and put in 3 or so slices of apple.

Like a dream!

Step 5: Gently fold the dough to wrap the apple as much as you can. My friend and officemate, Jie is making pork dumplings for our class tomorrow. I was trying to channel her dumpling making skills while folding these little apple thingers. I don't think it worked. 

Step 6: Probably should have told you to preheat the oven at 350 earlier huh? Do that now. One day I'll learn.

Step 7: Put the pastries on a cookie sheet. They won't expand too much so they can be somewhat close together. Here is a picture of my best pastry. Try to make yours look like this one and none of the other ones I made.

"Oh girl! No you didn't!" - You
"Yes. Yes, I did." - Me

Step 8: Combine egg with some water (just a splash of water) so you can cover the pastries with egg. This makes sure they're moist while in the oven. Then put a sprinkle of cinnamon on top for both flavoring and good looks. We're all about lookin' good.

Step 9: Put those suckers in the oven for about 15-20 minutes at 350. Once they've browned on the top, they're good to take out. They are not yet ready for consumption as they are probably still about 350 degrees in the middle. Maybe wait 5 minutes before eating them. They'd probably be super delicious with some vanilla ice cream. Yummm....


Such delicious little pastries!

Ways I could have and possibly should have modified this recipe:
1) Eat while enjoying a glass of Brother Vilgalys Krupnikas
2) Use Trader Joe's pumpkin pie spice 
3) Add pumpkin? Question mark?
4) Make the pastry part a little larger so the innards aren't falling out. Srsly. Get it together, innards.
5) Rather than slicing the apples, chop them** and mix it in with the stuffing.

Delicious Level: 4/5 Noms (om nom nom nom nom)
Difficulty Level: Easy Peasy.
Lesson Learned: Utilize one of the above mentioned suggestions. Also buy more Krupnikas next time in NC.

Here's to eatin' good and eatin' local! Cheers and uff-da!


** If Waffle House added chopped apples to their hash brown topping options, what would they call it?

A PhenAUTUMNal Meal!

Bonjour mon petit choux!

It's been about 6 billion moons since I last posted. My excuses include: grad school, moving, and not having a CSA. You're probably thinking "yeah yeah yeah! WHATever!" but it's true. Certain things in Central, PA are unreasonably expensive and some things are oddly cheap. The CSAs here (and PLEASE correct me if I'm wrong) are very expensive and out of my price range. Thus, I eat from trader joe's, the herbs my plants produce, and the occasional fruits and veggies my advisor brings into the office.

In May I wrote a review of an ultimate tournament and this semester I'm writing for a qualitative methods course. In both instances, I'm allowed to write the word "I". This is odd. Shouldn't I have to cite all of my thoughts (Winner, R., 2013)?! I remembered how much I love writing for the sake of writing without having to cite someone. One day I'll be badass enough to be able to cite myself and get away with it (Murray, A., 2013).

Today is the Autumnal Equinox. Thus, my new roommate and dear friends hosted family dinner with an autumnly (it's a word. Don't worry about it.) themed dinner. My late grandma used to say "if you've heard this story before, don't stop me because I love telling it!" In this way, Lauren has told me about 50 times that it is "Winter Squash Awareness Month". I let her tell me over and over because it's a ridiculous idea. What in the world does that even mean? Should we be aware the winter squash exist? Should we go to a winter squash shelter and adopt? Should we go to a winter squash shelter and volunteer to feed them? Regardless, we honored this special occasion with butternut squash baked pasta that I will spend the next 2 weeks working off.

This is a two part post: 1) Butternut Squash Baked Pasta; and 2) Baked Cinnamon Apple Pastries

Butternut Squashed Baked Pasta
Here is the original recipe from Cooking Light (LOL at the 'light' part)
http://www.cookinglight.com/food/top-rated-recipes/five-star-casseroles-00400000039138/page5.html

Que necesitas:
1 butternut squash
2 cups shredded mild-stinky cheese. We used smoked gouda and swiss.
1 lb bacon
4 cups milk
1/2 tsp nutmeg
1/2 cup flour
1lb baking pasta (penne eg.)
3 shallots
Balsalmic
Rosemary
1 large appetite
1 exercise routine earlier in the day
Parmesan

Step 1: make your dreams come true
Step 2: make him fall in love with you
Step 3: girl it's plain to see... you're the only one for me

Step 1 (for real): cube the butternut squash. Butternut squash is a royal pain in the ass to cut up. Peeling it is not an option nor is cutting it with a dull knife. You need to cut it into 3/4" slices.


You should also cut the skin off of the squash rather than peeling it. It will be a lot easier and a lot quicker and you really won't lose much of the meat of the squash.

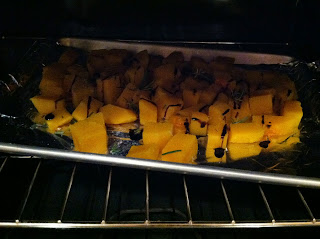
Step 2: Boil the squash for about 5 minutes, strain it and put it on a pan (a pan with oil so the squash doesn't stick).  Before putting the pan in the oven at 400 degrees, put some cut up rosemary on it, salt, and pepper and a little balsalmic.


This is the unsticking process for the squash if you fail to use oil.
"Sh*t! Should have used oil!" - (Abbott, L., 2013)

Step 3: Slice shallots and set them aside. Put about .75lb of bacon into a pan. I prefer thick cut, slovenian smoked bacon that was smoked by an old Croatian man named Elmer in Cleveland. If this is not an option, go for the highest quality bacon you can find. Perhaps the Chop Shop in Asheville can help you.... mmmm bacon. Cook the bacon until crisp and remove it to cool 

Step 4: Add shallots to the pan full of bacon fat. Yes. You read that correctly. Just park further away when you go to work tomorrow. I promise it's worth it. Saute them in the bacon fat until they're slightly  browned. 

Bacon fat + Shallots = Delicious

Step 5: Combine your squash, chopped bacon, and shallots in the pan and remove from heat. This will be added later.

Be sure to have a pet take up about 1/3 of the kitchen floor. This is most helpful.

Step 6: Cook the pasta. We used whole wheat penne pasta from Trader Joe's... to make it... you know... healthy?

Step 7: Time to make the Rue. Put the flour, salt, pepper, nutmeg, and milk into a deep pot. Whisk it until well mixed. On medium heat, continue to whisk until thickened. Once near a boil, remove from heat and mix in cheese.  You should now have three main components: The cheese rue, pasta, and butternut squash/bacon/shallots. 


Step 8: Mix all them things you made together and take in the delicious smells. 
All them things about to get mixed

"Things that don't photograph well" - By Alison Murray
Chapter 1:
This.


Step 9: Empty it all into a casserole dish(es), top with parmesan, and bake at 400 until melty and delicious looking. About 10 minutes or so.

Step 10: Serve up with some roasted veggies (we went with brussel sprouts and carrots for health) and eat.
Roasted Veggies = Health

Step 11: Presentation is everything. Make sure to enjoy this autumnal deliciousness with people you love. And wine. Wine is key. It is delicious.

Holy om noms, batman!

This dish was delicious. Probably very fattening but who counts calories anyway? Counting is exhausting. To quote Barbie "Gee! Math is hard!" Don't even bother.


Delicious Level: 4.5/5 Noms (om nom nom nom nom no...)
Difficulty Level: Lots of steps to time out! 2 people in the kitchen definitely helped!
Lesson Learned: More bacon, obvi. Ingles has a section called "Bacon". We should all learn a lesson from Ingles.

Saturday, August 25, 2012

Long time no post :(

Apparently during your last semester of your masters program and during that summer you get really bogged down with work/finishing your thesis/moving 8 hours away/etc. I have a lot to catch up on and hopefully will get caught up in the next few days. Here's what we have coming up:

  • Cajun stuffed bell peppers
  • Meaty marinara sauce
  • Pizza
  • A tour of my mom's garden (just so you can all be jealous)
  • Roasting peppers
This is Maebe being an adorable puppy. Good girl!!!

Thursday, March 22, 2012

My least sustainable meal yet

I debated on whether or not I would actually share this meal with you as it’s a little odd and the only local ingredients in it are pork and lettuce but they were so delicious that I’m just going to do it anyway!
Pork tacos with mango and pineapple salsa (so delicious!)
I got pork chops in my last CSA delivery and I was unsure as to what I was going to end up doing with them. We had some leftover mango pineapple salsa from the night before so I figured I’d make delicious tropical pork tacos. All the fruits and avocado were bought at Aldi, the delicious German grocery store scattered throughout the US that has food for entirely too cheap. I’m not sure how they’re allowed to discount their prices so much but they don’t provide grocery bags so I support them. I got 2 mangos, a pineapple, and 5 (yes 5) avocados from them for a whopping $8. Are you freaking kidding me?! Avocados there are $0.89!!! That’s $2 cheaper than at the teet. 

I’ve decided to add a new segment to my blog which I think you will all find very helpful: a grocery list :)
1 pineapple
2 mangoes
Cilantro
Purple onion
Green pepper
Pork chops
Tortillas
Cheese
Sour cream (you should always have this in your fridge. Sour cream : Eastern Europeans :: EPI pen : someone having a massive allergic reaction)
Orange Juice
Garlic, salt, pepper, olive oil

Let’s start with the mango pineapple salsa, shall we?
½ pineapple
2 mangoes
Cilantro
Garlic (if there ever isn’t garlic in one of my recipes, that was a typo)
½ purple onion
Salt
Pepper

Step 1) Cut up about half of the pineapple while occasionally snacking on pieces of it. Dice it up real small like into bite size pieces. Do that with the mangoes and the purple onion.  Also dice up the cilantro so your kitchen and your hands smell wonderfully like cilantro.

Step 2) Throw all your fruits, veggies, and cilantro into a bowl.

Step 3) Add in about 1 clove of garlic, salt and pepper to taste

Step 4) Mix it all together all delicious-like and enjoy with chips while you make your tacos.


Seriously that is one of my favorite summer snacks. It’s cool, calm, and collected (like Maebe when no one is watching).


Pork Tacos!
½ Purple onion
Green pepper
Avocados
Lettuce
1 slice (about ¾ cup when measured out) of pineapple
2 Pork chops
Tortillas
Cheese (we used pepper jack and it was the bomb)
Sour cream
Orange Juice
Garlic, salt, pepper, olive oil

The marinade:
This was a bit tricky because I used the Alison methodology of following recipes which is to glance at a few recipes online, follow the common theme while cooking, and see what happens. This generally works but this past time it did not. I’ll modify it here now, without having tested it just like this, and hopefully it will be delish.**
                **what we ate was delish but these modification should make it more delish.

Step 1) Put ½ cup of orange juice, ¾ cup ish of pineapple, ¼ onion, salt, and pepper into a blender and press liquefy. This will make what looks like a smoothie but, as a former professional blendgineer, I would recommend you don’t drink it. Put this in a Tupperware or plastic zip lock bag, or whatever your marinade/meat container of choice is.

Step 2) Chop up the pork into bite size pieces and throw them in with your marinade. It looks gross, but you’ll like the results (I hope).

Step 3) Go derp around for a little bit. Maybe walk the dog, go for a jog, perhaps throw a Frisbee around. I personally enjoy pestering the neighbors although there is also always work to be done.

….2 hours later….

Los tacos deliciosos:

Step 1) Get out a nice big pan for sautéing and, on medium heat, put in olive oil, salt, and pepper.

Step 2) Put the pork (not the pork and marinade as you probably have more marinade than pork) into the pan and add a little bit of marinade.

Step 3) Watch it simmer and cook for about 5 minutes.

Step 4) Ask Jordan to remove the batteries from the smoke detector temporarily. Too late. When is my lease up?

Step 5) Did you dice your green pepper yet? I didn’t tell you to do that yet. Oops. Dice it up and then throw it into your pan. It should look something like this:

Assembly:

On top of your tortilla combine pork with peppers, lettuce, avocados, cheese, salsa, and sour cream… or whatever else you want. I bet black beans would be a nice addition to this dish but I happen to think they’re nasty.


I was skeptical about this dish but it turned out to be pheNOMenal!  One of our lovely neighbors walked into our apartment and said it smelled heavenly! Boom! I wish my smoke detector had the same sentiments…

Delicious Level: 4/5 Noms (om nom nom nom nom)
Difficulty Level: Not too bad. Lots of steps
Lesson Learned: Figure out the marinade :D


Here's to eatin' good and eatin' local! Cheers and uff-da!

Monday, March 12, 2012

and now... the recipe you've been waiting for (whether or not you knew it): Milk stout marinated steak!

During my first semester at ECU, my boss took me to dinner to meet our guest speaker for the following day and wine and dine them. We ate at Starlight Cafe in downtown Greenville. That place is amazing. Steak is one of my favorite foods and of course they had on special, a 20oz local steak marinated in Duck Rabbit Milk Stout. My jaw hit the floor. As Ron Swanson once said "that's my #2 favorite food wrapped around my #1 favorite food." Once I realized it was far and away the most expensive thing they were serving that night and I wasn't picking up the bill, I thought I'd be polite and order the chicken (womp womp). I have never seen this steak at Starlight since that night. This summer I made two giant steaks for dinner and marinated them in Duck Rabbit Milk Stout and they were pretty phenomenal. Nick and Jenelle stole Whit's grill for the evening so I figured it was time to make and share the 4 steaks I had sitting in the freezer. Only this time, I made kebobs!!!!

All in all I think I had about 4lbs of Chuck Eye Steak and Flat Iron Steak

Here's what I used and how this mouth watering deliciousness made it into my belly:
  • 2-3Yellow Onions
  • 4lbs steak
  • 2 green peppers
  • Cherry tomatoes
  • 2 cloves of garlic
  • 1/4 cup of Worcestershire Sauce (the day I spell that correctly on the first try will be a magical day)
  • Salt
  • Pepper
  • Olive oil
  • 6 pack of Duck Rabbit Milk Stout (you'll only use 1 to cook, the other 5 are for drinking)- Side note: This isn't a chicken. You can't just stick a can of Beer 30 (google it) in the steaks ass, throw it on the grill, and expect a delicious steak. You have to use good beer.... and make a marinade.
  • African Smoke Seasoning (if you have it... did you go to Trader Joe's and get some yet? I asked you to do that the other week!)

Step 1: Chop up your meat. I didn't do that. I was trying to make my marinade while chopping meat and that was somewhat of a disaster. Chop the meat into little bite size pieces about 1" cubed. Put it in a gallon zip lock bag or a large Tupperware.
Step 2: Ask Jordan (or anyone, you can do this step yourself if you'd like) to drink about 1/4 of the Duck Rabbit/Milk stout of your choosing


Thanks, Jordan! What a guy!

Step 3: Cut up your garlic and onions into small pieces. If you're going to marinate an entire steak, I would leave the onions in rings but sliced rings that are separated.
Step 4: Put some olive oil in a pan large enough to hold the beer, Worcestershire sauce (didn't get it that time), onions, and garlic.
Step 5: Throw in the garlic, onions, salt, pepper, and smoke seasoning and let it all flow together all juicy like for a few minutes on medium heat. We don't want to set off the smoke detector again (too late).

mmmmmmmmmmmmm already smelling delicious

Step 6: Add in the Worcestershire sauce and let things simmer a little longer. Simma down now.


Step 7: Turn the heat down a little bit or you will set the alarm off.
Step 8: Alarm is going off anyway. 
Step 9: Pour in about 3/4 of the milk stout and let it simmer for a little bit longer.
Step 10: Pour your amazing smelling marinade on the steak and put it into the refridgerator and enjoy how everyone who is walking into your apartment is talking about how good it smells! Honestly though, hot Worcestershire sauce will make anyone's mouth water.
om nom nom nom
Generally I like to let the marinade soak for a few hours. When time isn't on your side, 2 hours is sufficient.
Step 11: Clean up some stuff around the apartment and hire a nice young lady from Wisconsin to chop up 2 bell peppers and 2 yellow onions into 1" or so squares.

Thanks Janna! What a gal!
Step 12: Once your nice Wisconsinite has stabbed all the meat and veggies with the skewers, allow her to have a beer and then take the kebobs down to your grill master. In this case, my grill master was a terrifying yoga teacher from PA.

This picture of Nick is actually a little terrifying.
Step 13: Once the steak is cooked to your liking (burnt to a crisp or bloody as hell) pull them from the grill and enjoy!

These were particularly spectacular, if I do say so myself!

Delicious Level: 5/5 Noms (om nom nom nom nom nom)
Difficulty Level: Easy but many many steps.
Lesson Learned: Start earlier so the steak can marinate longer.


Here's to eatin' good and eatin' local! Cheers and uff-da!

Wednesday, February 29, 2012

Cheeburger, cheeburger, cheeburger no coke, pepsi!

What do you call a cow with no legs? Ground beef :) Now, I should end my post with that phenomenal joke but I will continue because you're probably dying to know what I did with the pounds upon pounds of natural ground beef in my refrigerator. The ground beef is generally saved for taco night and it's generally amazing. Since that would be a four-line post, I'm going to instead talk about these amazing burgers that I made the other night. To begin, I must admit that my mom makes the BEST burgers (for full disclosure I've never had a juicy lucy) so I come from a line of great burger makers. That being said, I'm generally not allowed to make hamburger patties or grill them because they end up being little ground beef balls rather than patties.... but things are going to change! This time I made some mix between a patty and a ball!!! Almost there.

Here's how it all happened...
I got some awesome burger like stuff together and threw it in a bowl with 1 pound of ground beef
I used these things:

Oils and sauces and spices, oh my!

Step 1: Throw olive oil, Worcestershire sauce, soy sauce, salt, pepper, and South African Smoke Spice from Trader Joes. That stuff is SO good and I highly recommend you pick up a bottle next time you see a TJ's.

Step 2: Put a healthy amount of each of those things in with your beef and mix it up real good. You're going to have to use your hands to make the patties so you may as well mix all the stuff with your hands and just get jiggy with it.


Step 3: Start to make the patties. I have no tips for this... Ms. Joy might have some tips so you could consult her. Really I just want the little burger patty press my mom has. Add it to the registry! Until then, I'll do my best!

This is me doing my best

Step 4: I don't have a grill so I just put those suckers on the stove. They had so many fabulous things mixed in with them that I don't think they really lost too much flavor.

Step 5: BACON!!!!!! Here's another little lesson for you. From my experience and generally speaking, people from the south have family rooted in the south for many many many generations. People in the north and midwest can trace their family back to their roots (or ruts if you're from the midwest) outside of the US in 2-3 generations. Example: Whit's last name is Winslow. Winslows are a dime a dozen in Eastern, NC because there was a Winslow that came over on the Mayflower. No joke. Similarly, my dad's side of the family has roots in Tennessee and our family has apparently been traced back to manifest destiny days. My mom's family, on the other hand, is from Cleveland area (I love Cleveland). My grandparents are from Slovenia/Slovakia/Hungary. We love sour cream. In Cleveland there are butcher shops and restaurants serving European fare from people 1-2 generations fresh off the boat. This means a few things: 1) I eat like a boss when I'm visiting my family in Cleveland; 2) I get to stay connected with my eastern European roots; and 3) I get to bring home so many Slovenian smoked meats from artisan butchers whenever I leave Cleveland. My uncle calls my mom and I meat smugglers. He's right. Weeping Radish Brewery in Manteo has bacon artisan butcher made bacon. I suggest you buy all of it and then give it to me for my birthday.

Step 6: Step 5 wasn't really a step.


I think I love this bacon more than most things...

Step 7: Take your delicious artisan butcher cut bacon and throw it in a pan until it's all crispy-like.

Step 8: Put a little Munster cheese on your burgers (I once asked my mom for cheese to put on my burger and she called me high maintenance (again, that's another story for another day)).

Step 9: Remove the burgers from the stove, add your delicious cooked bacon, and some avocado slices. Oh yes. Avocado bacon cheese burgers! How do you think I keep this figure? It's not with salad.

Step 10: Assemble your burgers and enjoy. SO delicious!


Delicious Level: 5/5 Noms (om nom nom nom nom nom)
Difficulty Level: Pretty easy. Bacon access is limited though.
Lesson Learned: Buy a freaking patty press. My inability to make a quality patty is out of control.


Here's to eatin' good and eatin' local! Cheers and uff-da!